
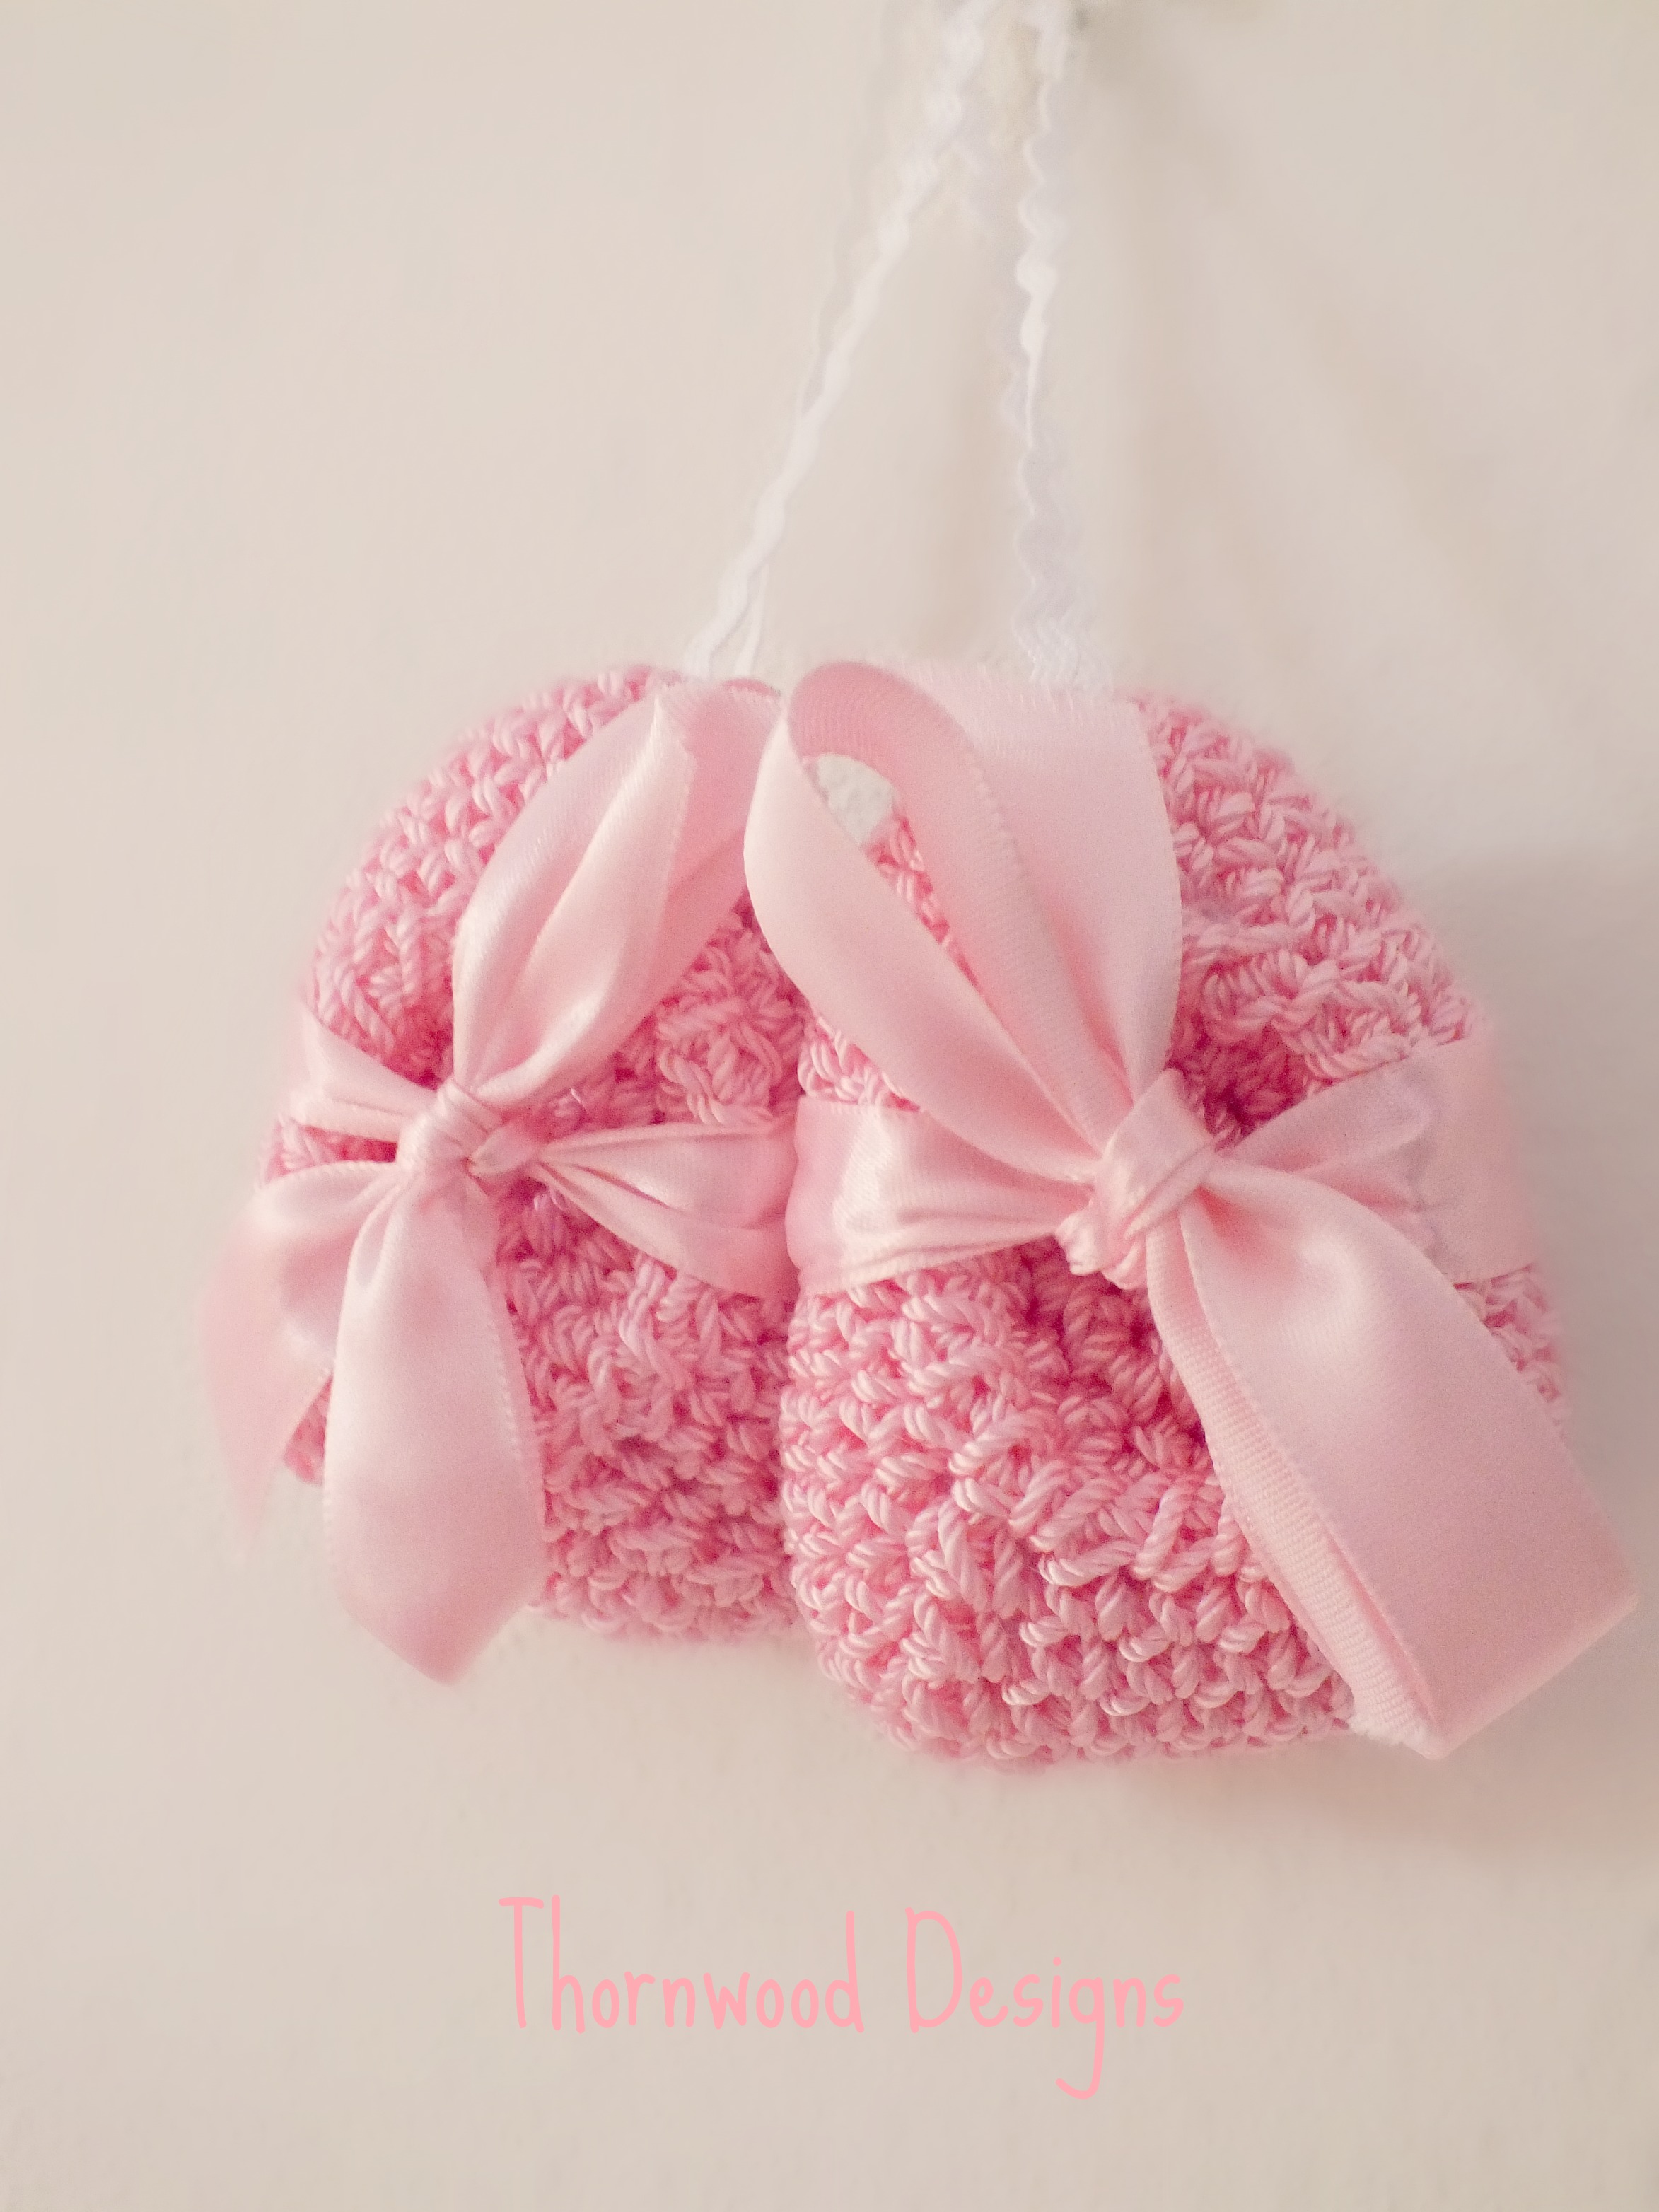
Baby Foot Crochet Pattern
I design crochet mannequin forms (I started with the infant/baby crochet mannequin heads in early 2012 ). I have had requests for a mannequin baby foot: might seem strange, but I think some artisans create baby sandals, booties, and even socks and a foot form can help with sizing and display for photos. So here is my latest pattern which I am offering for free on my new blog site for Thornwood Designs Crochet. I have included a photo tutorial to help with completion.
Please visit my Etsy shop, THORNWOOD DESIGNS to see more of my patterns and latest crochet mannequin creations. https://www.etsy.com/shop/ThornwoodDesigns
A little more about this pattern: This pattern is created so that if you wanted to create larger sizes you can by using a larger gauge yarn or nylon thread with a larger hook. Or if you are more experienced in crochet, you can alter the pattern to increase it by adding stitches.
Experience Level: Medium (solid experience working crochet patterns)
Stitches you need to know:
Sc: single crochet
Inc: Increase stitch (2 sc in one st)
Dc Inc: Double crochet Increase (2 double crochet in one st)
Dec: Decrease stitch
Materials Needed:
Stitch marker
50 yards or so of #18 nylon crochet thread or sport weight baby yarn
Size E crochet hook or hook to achieve correct gauge
10 oz of fiberfill Morning Glory Premium or Fairfield Crafters Choice (course, firm, dry kind).
Gauge:
5 st and 4 rows = 1 inch
Finished Size of foot length you will want to achieve:
12 month 4.5” (size accommodation is an estimate only)
Newborn 3” (see pattern notes for changes)
Adjust bottom of foot and/or hook size to achieve sizes below (sizes of accommodation are approximate. please use your own resources to ensure your finished foot will accommodate a particular size range. This is simply provided as a general guideline):
6 weeks to 3 months 3.5”
6 to 9 months 4”
18 month to 24 month 5.25”
24-30 month 5.5”
36 month 6”
Size adjustment tips:
I have provided the pattern details for approximately a 12month size baby foot, but you can make some simple changes to pattern to increase or decrease size of the baby foot mannequin.
Pattern can be altered to achieve a larger or smaller size foot by adding or eliminating some sc “short rows” to increase length of the sole of the foot (at the 7th row) or use a smaller/larger hook, smaller/lighter weight thread/yarn or larger weight thread/yarn.
Size differences between some baby age groups are slight, so adding a row or two to increase the length of the sole would work. If adding rows to increase length of sole, this changes the number count that is provided in pattern on the perimeter rounds below in the pattern: simply follow same pattern but increasing or decreasing the stich count in the perimeter rounds by 1 if you add 1 row or delete 1 row, or by 2 if you add 2 rows or delete 2 rows, etc.
If wanting to complete a toddler size foot, 24 month or 36 month: you probably want to increase the width of the foot by a ½” or so. Try adding a 4th Rnd of the circle portion of the sole of the foot: *sc st, Inc next 2 st* (Follow this around). Then when starting short rows change each st count provided by adding 2 to that number: example the 4th row is “sc next 4”, this would change to “sc next 6 st”.
You can play with the proportions by increasing circle portion of sole by adding more rounds to make a wider finished foot, and by adding more lengthening rows. Start out by making the 12 month size provided in the pattern below to see how pattern works; then experiment to create different sizes of foot.
Instructions below are for the 12 month size (with changes for newborn size):
Ch 4, make a loop.
1st Rnd: 8 sc in the loop, place stitch marker at last st (replace stitch marker at last stitch until pattern specifies otherwise).
2nd Rnd: Inc in each st around (16 st).
3rd Rnd: *Sc st, then Inc st in next st* (Follow this * around). (24st) –Skip this Rnd for newborn.
(add a 4th Rnd here to Increase width of foot for a toddler size: *sc st next 2 stitches, Inc st next st*-follow * around-32 st)
Short rows are numbered below and now identified as “rows”-work as a flat crochet piece now, turning work at end of each row just as a normal flat crochet pattern. Remember if you are making a larger size and added a 4th round or so above, the stitch counts will be different on the following rows.
1st row: Sc next 4 st after your stitch marker, ch.1, turn. Always ch.1 at end of each row. Add 2 or so stitches here if you have added a 4th rnd above to increase width of foot for toddler sizes: change subsequent st count accordingly.
2nd row: Sc next 5 st (remove stitch marker).
3rd row: Inc st, sc next 3 st, Inc st.
4-7th row: Sc next 7 st across (4x) (2x for newborn). Add rows of sc to increase or decrease the length of your desired finished foot.
8th row: Inc st, sc last 6 st. (this makes right foot). To make left foot: Sc next 6 st, Inc last st.
9th row; right foot: Sc next 7 st, Dc Inc (Double Crochet Increase) in last st. (this will make the “big toe” area). Ch 1, turn work, don’t end. This is the right foot.
To make left foot; 9th row: Dc Inc first st, sc last 7 st. Ch 1, turn work, don’t end.

Picture above shows the shape you will have prior to the perimeter rounds
The following are marked again as “rounds” (rnds) since you are working around the perimeter of the foot. These are the “perimeter rounds”.
You want your perimeter stitches to curl away from you as you crochet them; the sole of foot facing you is the “right side” of your work (“right side”: the part you are able to see when project is stuffed and finished). Pull stitches somewhat tight on the perimeter rounds: no loose stitches.

1-3 rnd: sc across next 9 st: mark last st of the 9 sc (cont. to replace st. marker throughout): continue 47(34 newborn) sc around the perimeter of the entire foot (skip down to row below to start the perimeter sc along the side; sc in each row and st around). Go around 3x for 12 month size (2x for smaller sizes). Perimeter st count will change if you added short rows to sole of foot.
4th rnd: sc next 8 st (sc next 4 newborn), dec st, sc next 8, (6 newborn) st, dec st, sc next 8 (4 newborn) st, dec st, sc next 8, (5 newborn) st, Dec st, sc next 7 st ,( 5 st newborn), Dec st (replace st marker in Dec st). Perimeter st count will change throughout if you added short rows to sole of foot: simply “eyeball” where the Dec stitches need to be on this rnd, then cont. to follow the pattern of sc over sc and Dec over Dec. on following rnds. Use your 12 month size as a model to assist in completing large sizes.
5th rnd: sc next 6 st,(4 newborn), Dec st, sc next 7, (5 newborn) st, Dec st, sc next 7 (3 newborn) st, Dec st, sc next 7,(4 newborn) st, Dec st, sc next 6 st,(4 newborn) st, dec st (replace st marker at last Dec st).
6th rnd: sc next 5 st, (3 newborn) st, Dec st, sc next 6, (4 newborn) st, Dec st, sc next 6 st (2 newborn), Dec st, sc next 6 st, (3 newborn)st, Dec st, sc next 5 st, (3 newborn) st, Dec last st (replace st marker into last st).
(skip for newborn)7th rnd: sc next 4 st , Dec st, sc next 5 st, Dec st, sc next 5 st, Dec st, sc next 5 st (4-left), Dec st, sc next st, Dec next st, sc next st, Dec st (replace st marker into last Dec st). You will have an alternating pattern of Dec st, sc, Dec st, sc, Dec st, across front of foot: do this pattern across front of foot also for the toddler sizes.
8th rnd: sc next 7, (5 newborn), Inc st, sc next st, Inc st, sc next st, Inc st, sc next 9 (8-left), (5 newborn) st, Dec 3x across front. (replace st marker in last Dec) For larger size adjustments; just sc to about the start of the heel, then do the Inc, sc, Inc, sc, Inc evenly across back of the heel, then sc to front of foot, then Dec 3x across or 4x across front, depending on what size and how many Dec you want at the front.
9th rnd: Sc next 8 st, Inc st, sc, Inc st, sc, Inc st, sc next 11 st, (replace st marker). (newborn size: sc next 7 st, Inc st, sc, Inc st, sc last 10 st) For larger size adjustments; just sc to about the start of the heel, then do the Inc, sc, Inc, sc, Inc evenly across back of the heel, then sc to front of foot.
10th rnd: Sc next 25,(20 newborn) st, Dec st 2x (Dec 1x newborn), (st marker in last Dec st).
11th-15th rnd: Sc around perimeter of foot 3x. Sc an extra 5 st at end of 3rd time around; End at the side Dec st on the side of foot.
You can add sc rounds to increase length of ankle to your desired size.
End. Weave in the end.
You will need to push out the big toe area with your index finger while stuffing with the firm fiberfill. I will use the point of a knitting needle midway through stuffing to keep the big toe area accentuated with the fiberfill.
The amount of stuffing used, and how firmly you pack it in will affect final measurements; stuff accordingly. I will then push and mold the foot into a final shape that I want; flatten out top a little, push in side arch area a little, etc.
Don’t over stuff the foot. Measure your foot to ensure you are reaching the desired measurements or not exceeding your desired measurements.
Once stuffed; then sew on the top of the mannequin foot.
Finishing touch: (optional)
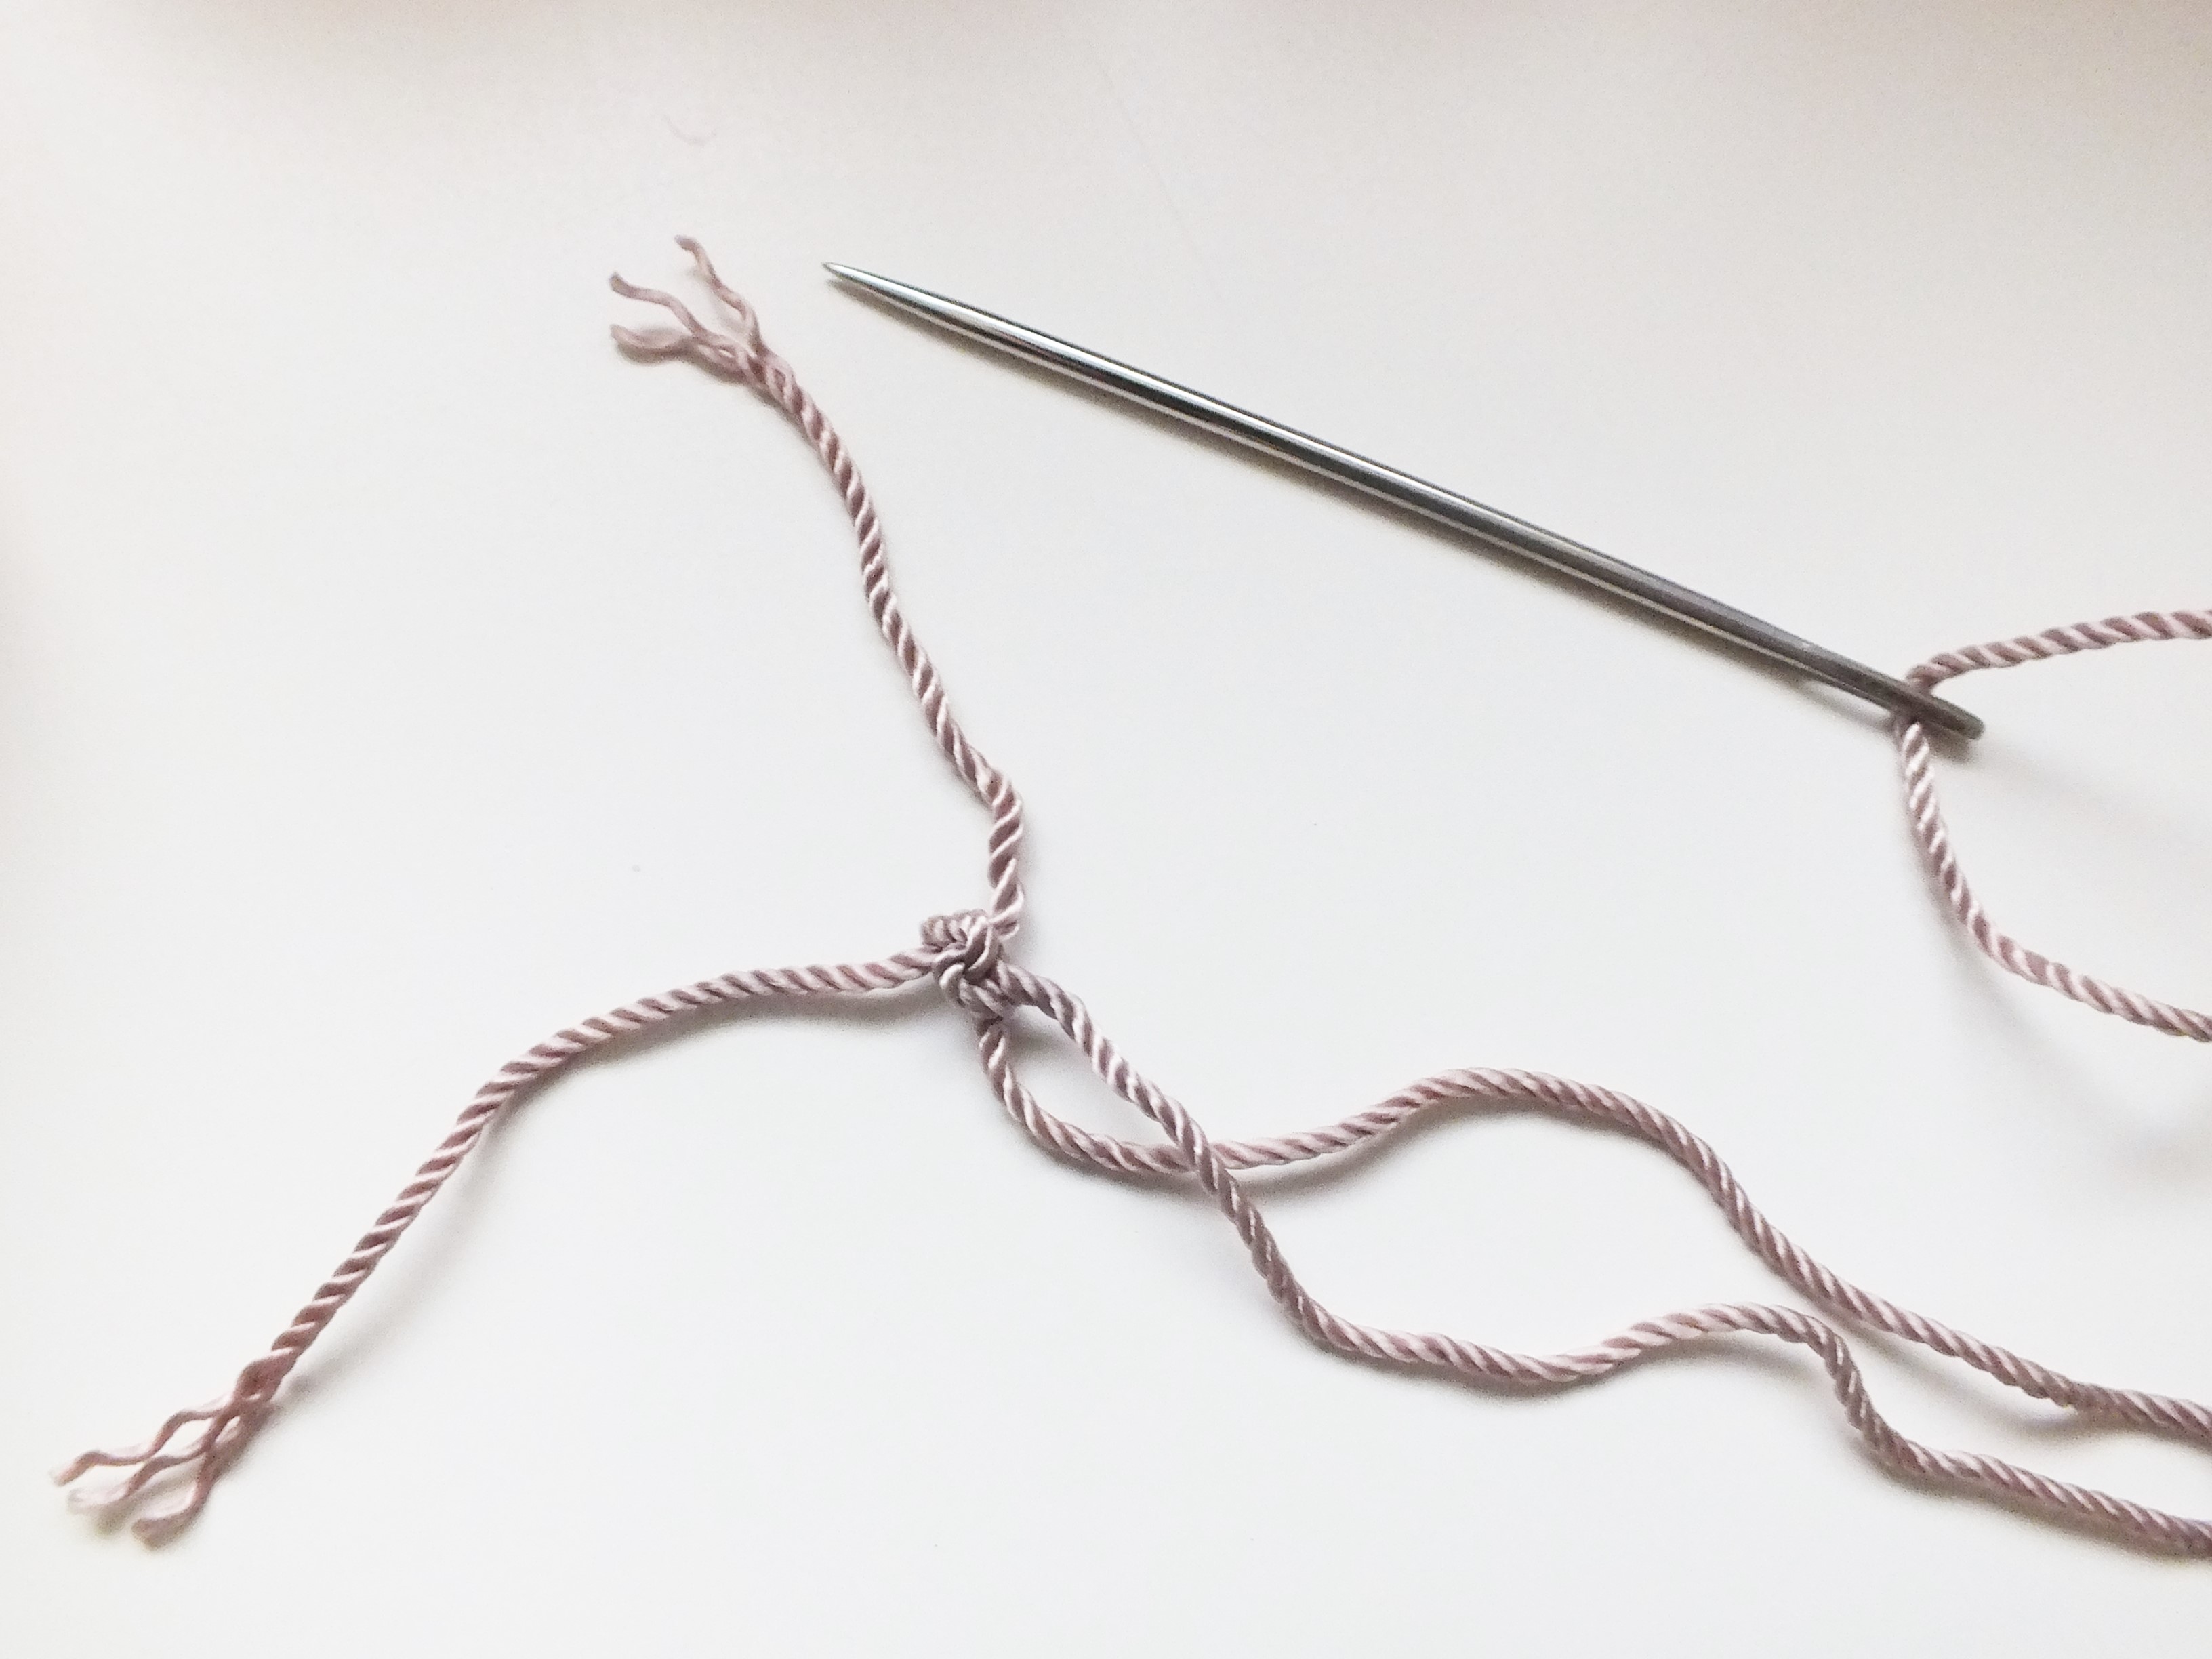
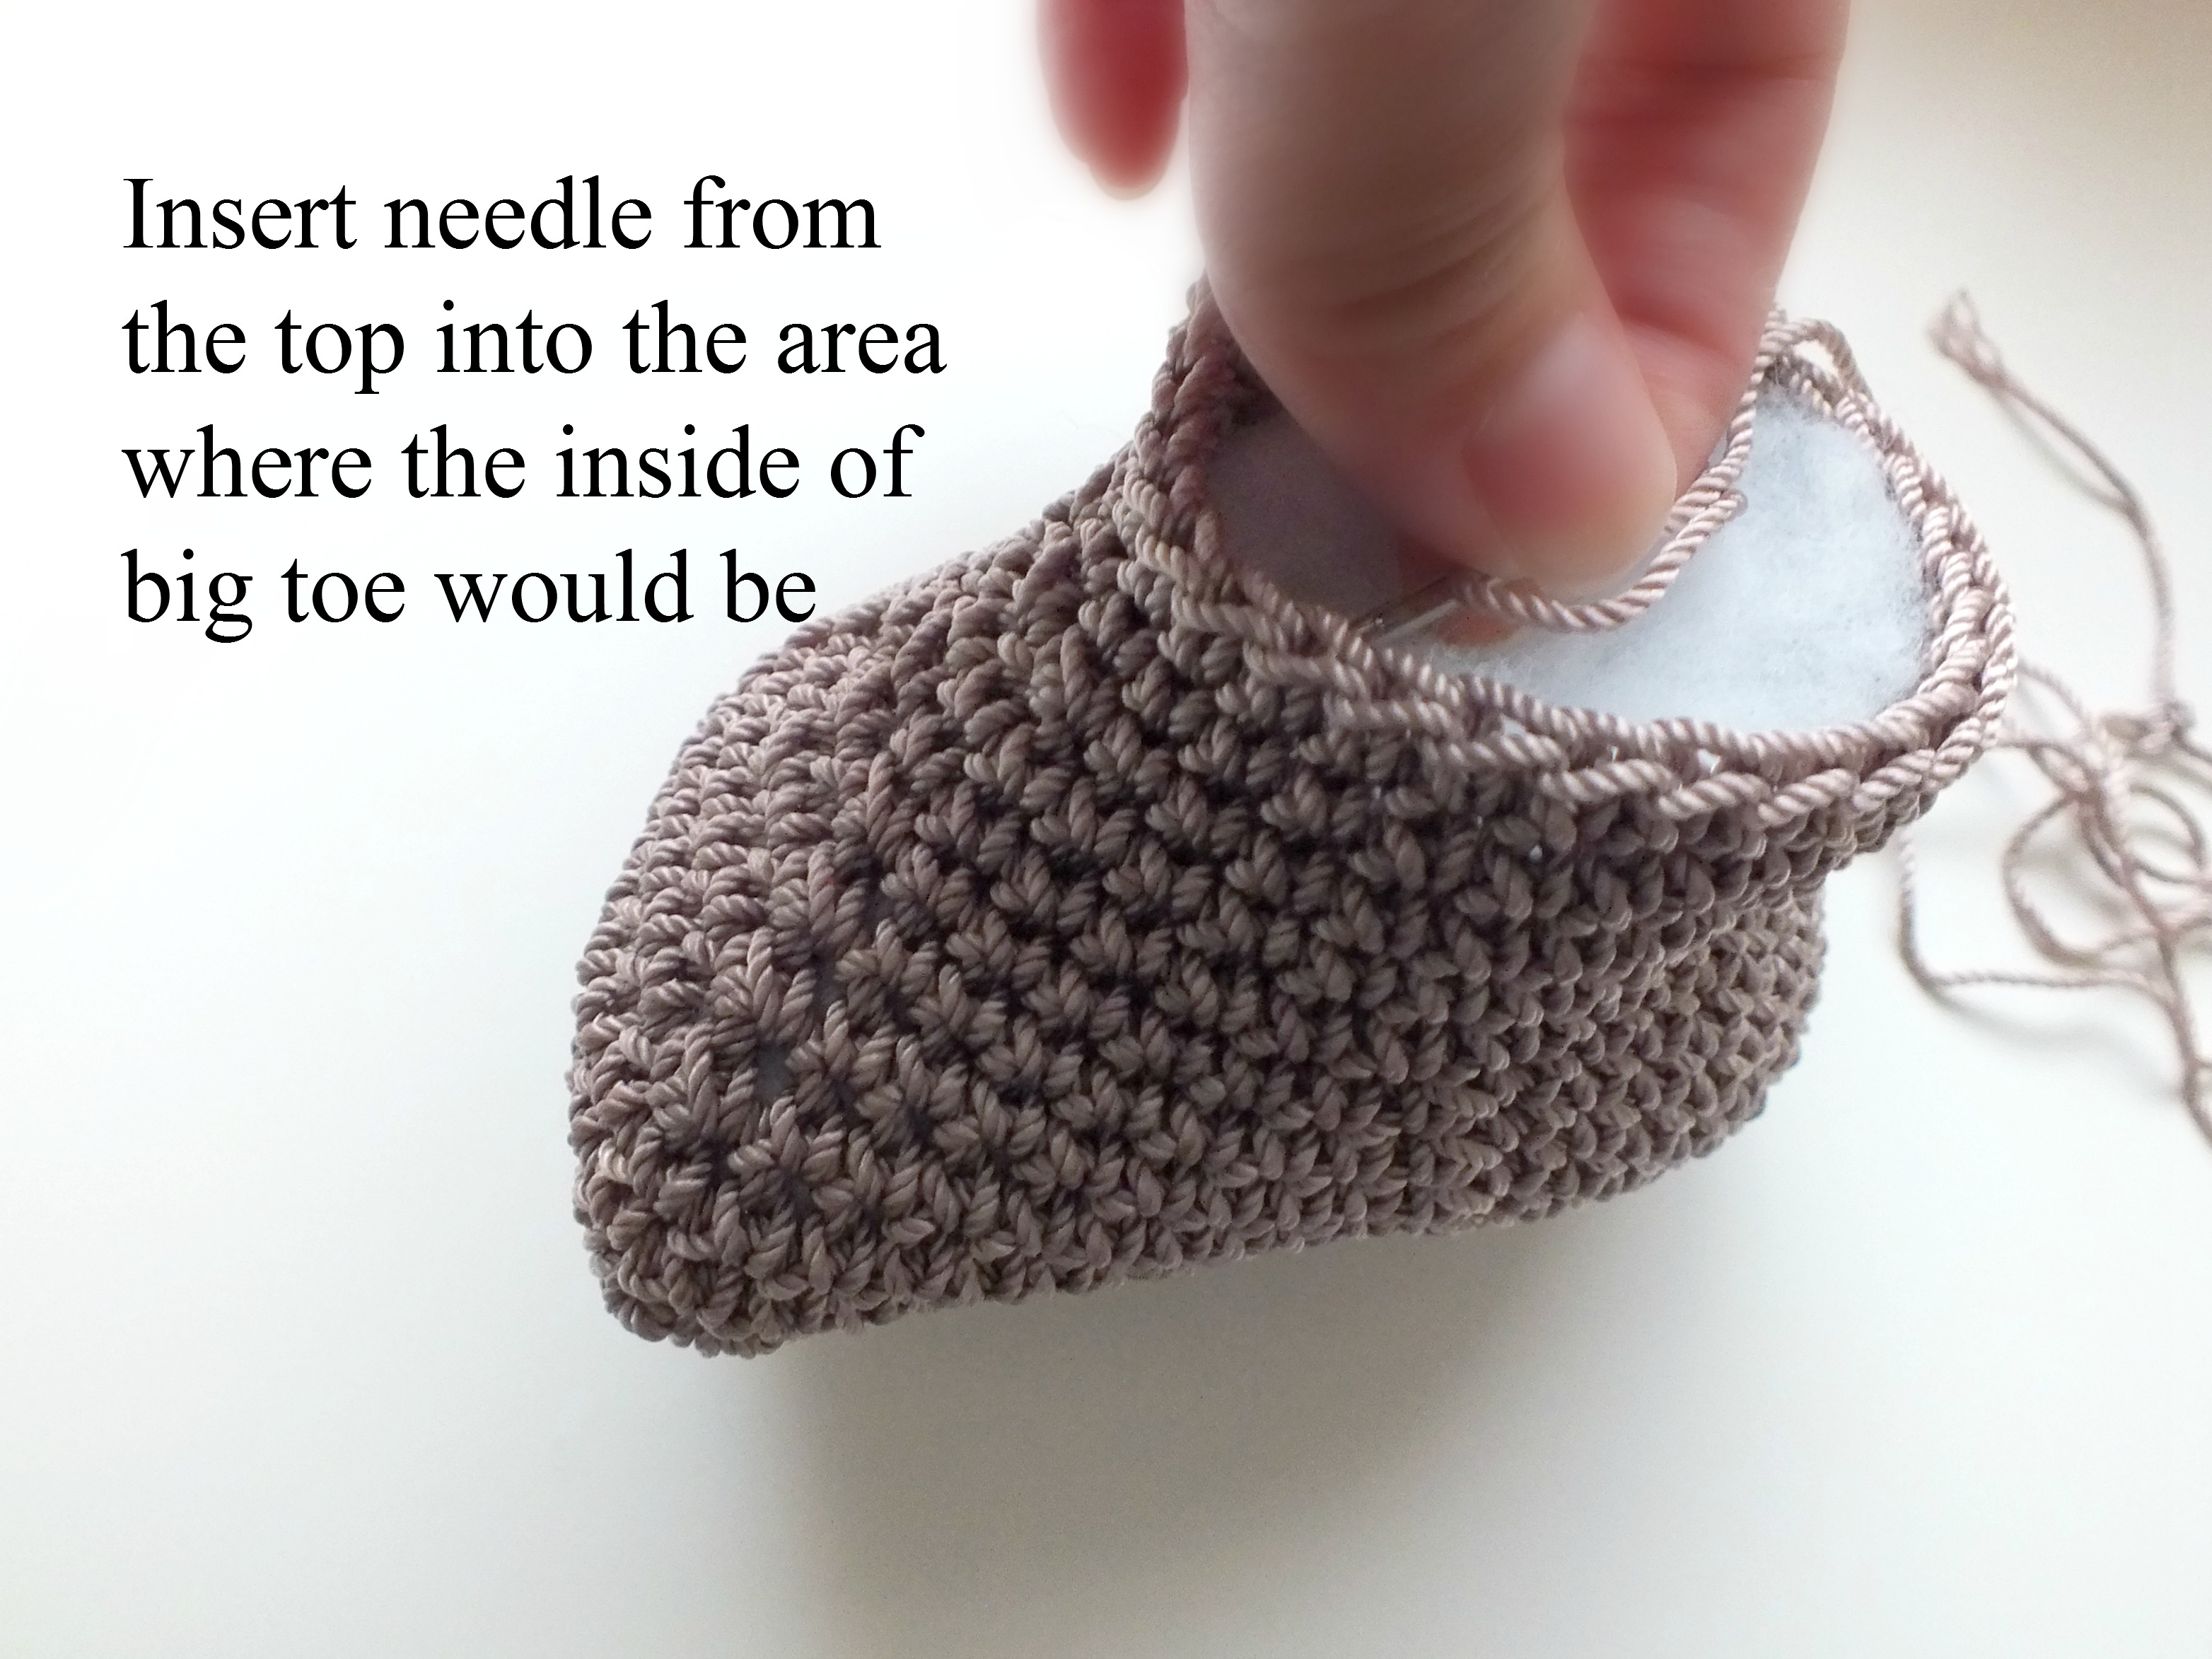
To create and accentuate “big toe” area; take about 8 inches or so of the same yarn or nylon thread and use to create the toe area. Make a knot at the end with the 2 ends. Insert through the top opening of the foot and have the thread come out from where the inside of big toe would be (go through the fiberfill-push any back in where the needle comes out if some gets stuck on needle while pulling it through). Or accentuate the big toe area prior to stuffing.


Generally, have the needle come out where the inside of the toe would begin. Take thread over front of foot and re-inserting needle in same area on the bottom of the foot; pull thread/yarn really tight; do this about 3x total and then weave in a little of the yarn next to area to hold the yarn/thread secure.


Top of mannequin foot:
Ch4, join to make circle.
8 sc in the circle. (replace st marker at last st)
Inc in each st. (16 st)
*Sc, Inc st* (Follow * around) End here for newborn size.
*sc next 2 st, Inc st* (follow * around).
End. Leave about a 24” or so tail; you will use this long tail to sew the top of mannequin foot on.


Final Note:
Gauge is such a particular thing, and I found even when crocheting at a stated gauge, items can still come out differently than the designers. Keep in mind this item is stuffed; regardless of what your gauge is, stuffing can affect the final measurements. Overstuffing can alter gauge just as under stuffing can.
You can create and sell the finished crocheted foot/feet online if you like. Please give me credit for design by including name of my Etsy shop. Here is the link for Etsy: https://www.etsy.com/shop/ThornwoodDesigns?ref=si_shop
The name of my shop is Thornwood Designs on Etsy.
Use only your own pictures in your shop listings.
Do not create your own pattern by adding additional written sizes via alterations to the pattern, then market and/or sell/or give away the pattern.
Do not alter, reformat, recreate, reproduce, or copy in any way this pattern and then sell the pattern or market the pattern as your own. Do not post the pattern online, do not share the pattern pdf or any other format of the pattern, only share the link to my pattern.
©Copyright 2014 Natalie Sovde. All rights reserved. No part of this document may be reproduced or transmitted in any form or by any means, electronic, mechanical, photocopying, recording, or otherwise, without prior written permission of Natalie Sovde (NanLucyCrochet/Thornwood Designs).


You must be logged in to post a comment.